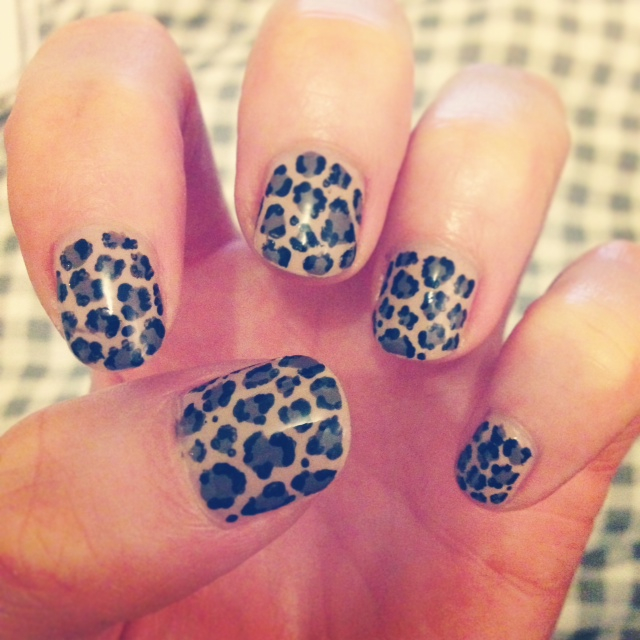
Weekly nail art tutorial: Classic leopard print
If you’re anything like us, you’ll be spending an unhealthy amount of time scrolling through Instagram looking at insane nail art and wondering how the hell they do all of their intricate designs. Well wonder no more – if your nail art jobs are more “ahh!” than “wah!” we’re here to help. Our super-easy-to-follow weekly tutorials will show you how to give your mates serious nail envy (and it’s way easier than you think).
For our debut into the nail-art-tutorial world, we thought we’d ease you in with a classic leopard print. This is a great one as you can pick any two colours you like for the base and spots – just steer clear of anything too dark as the black outlines won’t show up as well.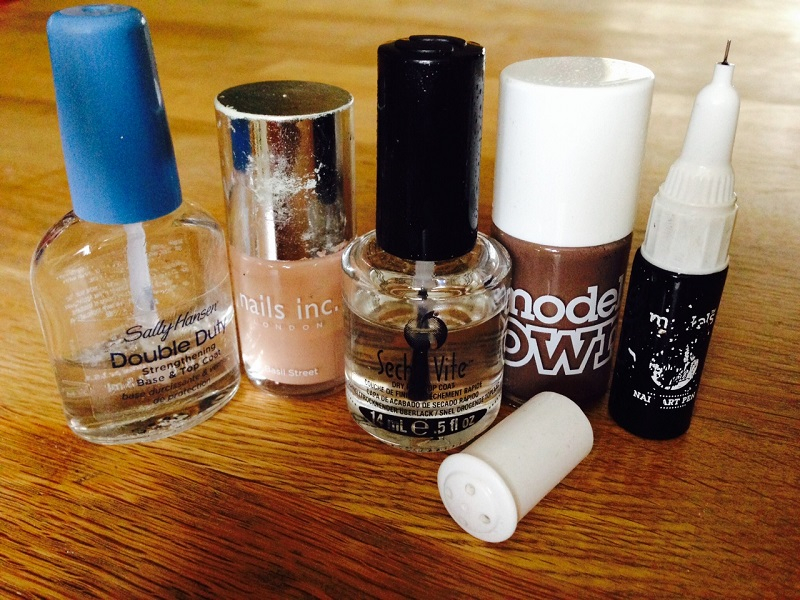
What you will need:
Base coat (we used Sally Hansen Double Duty)
Nude-coloured polish (we used Nails Inc “Basil Street”)
Brown-coloured polish (we used Models Own “Pray”)
Black nail art pen (we used Models Own black nail art pen)
Top coat (we used Seche Vite top coat)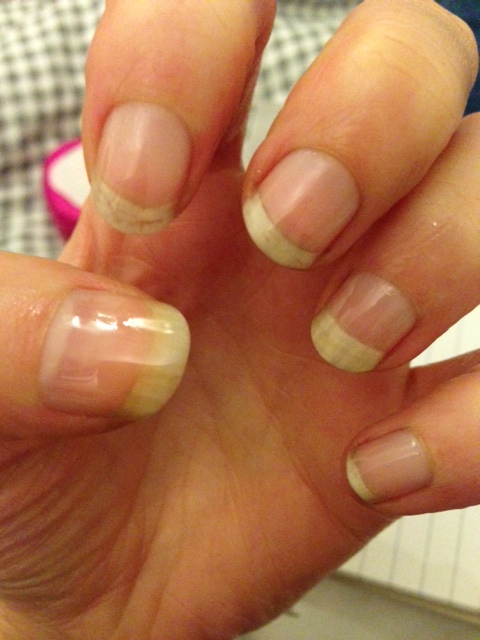
1. Apply a single coat of clear base coat and allow to dry. This coat will protect your nails and prevent them from staining.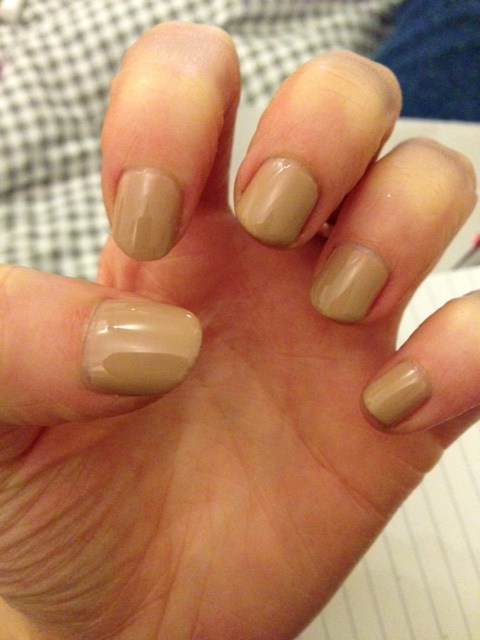
2. Apply a thin coat of a nude-coloured polish over the entire nail. Leave to dry before applying a second coat.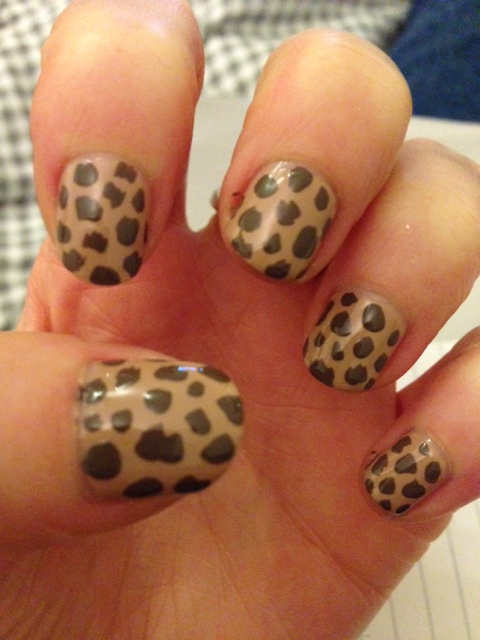
3. Now for the spots. Grab your brown polish and make sure that the brush is fairly loaded with polish. Dot the end of the brush on to your nails to create different-sized spots. It doesn’t matter if they’re different shapes and sizes as this makes for a more interesting print. Also, don’t worry if the spots are raised – these will flatten out when you apply your top coat.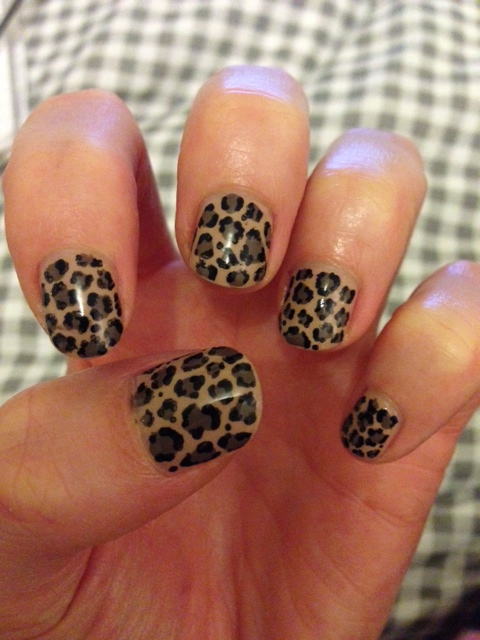
4. Once the spots are dry it’s time for the outlines. Using the nib of your black nail art pen, draw three short lines around each spot. These can be “c-shaped”, “v-shaped” or simply a splodge. The less uniform, the better. If there are any gaps between spots, use the nib of the pen to create little black dots.
5. Once the design is dry (this should only take a couple of minutes) you need to apply a top coat to prevent all your hard work from chipping. It’s important to really load the brush with polish and starting at the cuticle, “dab” the brush all over the nail, working from the bottom to the top. If you brush the top coat on, you’re more likely to smudge the design – not desirable.
Allow to dry for ten minutes and get showing them off!
Laura McLeish


Facebook
Twitter
Instagram
YouTube
RSS